Standalone

Wednesday, May 27, 2015

How to add a PayPal donate button to a blog in 7 easy steps


Add a donate button to your blog
Donate Button Example


Hello again and welcome to my Blog!

For this tutorial I am going to show you how to add a donate button to your bloggers homepage.

The donate button comes in handy when people would like to give you a donation via Paypal for all your research and hard work on your blog posts.

You can see another example by going to my blog's homepage.

Step 1:
You have to apply for a Paypal account. But for this tutorial, I will assume that you already have a Paypal account. If you don't have a Paypal account you can apply by clicking here.

Step 2:
Log in to your Paypal account and click on the My PayPal Tab.

Image for Step 2
Step 3:
Now go to the Merchant Services Tab.

Image for Step 3

Step 4:
Find the Donations Tab in the Merchant Services page located under the "PayPal Website Payments Standard" category and go to the link.

In this section you can customise your donate button to your own liking.

Step 5:
Create your PayPal payment button by pressing the Save Changes Button.


Step 6:
After you have saved your button customisation changes, you will be directed to a page that's going to give you your widget code.
Press the Button >Select Code >Right Click on your mouse >Copy


Step 7:
Add the widget to your Blogger Account via the Html/Javascript Widget on your layout tab.
Just Paste your code in the content box and your done!!




Blogger Currently Online Widget

Blogger Currently Online Widget


This Tutorial is based on a service provided by whos.amung.us

In this tutorial I will share with you an easy way of putting a widget on your Blogs Homepage to show you and your current viewers, how many visits you currently have online.

Intro:
You can either visit whos.amung.us website or copy the code directly from here and follow the steps.

Step 1:
Highlight the code below and then copy it by pressing Ctrl+C.


<script id="_waudye">var _wau = _wau || []; _wau.push(["classic", "5zolcb8qdwna", "dye"]); (function() {var s=document.createElement("script"); s.async=true; s.src="http://widgets.amung.us/classic.js"; document.getElementsByTagName("head")[0].appendChild(s); })();</script>


Step 2:
Go to your Blogger account >Layout


Step 3:
Add a gadget where you would prefer your online viewer widget to be.


Blogger Add A Gadget Image


Step 4:
Scroll down to Html/JavaScript and press the plus sign to add the widget


Html/JavaScript Add-On Image


Step 5:
Now just type in your preferred Title for your widget or leave it blank, then paste the code in the content box by pressing Ctrl+V.


Step 6:
Save and close the widget and youre done, you can now preview your blog.


Your Widget will look like this Image

Note:
If you would like some different style widgets you can always visit the whos.amung.us website.

Yoast Plug In For Blogger | Seo Your Blog or Website


In this tutorial I will show you how to copy and paste an Html code, called Yoast for Blogger, this is actually a seo plug in for wordpress, but has been optimised for blogger.
This code has most of the important meta tags necessary for your blog or even your website.

Step 1:
Go to your Blogger Account > Template > Edit Html

Step 2:
Copy and Paste the code below just after your <head> tag

<!-- Yoast SEO Plugin For Blogger By Livoxt Starts --><b:if cond='data:blog.pageType == &quot;index&quot;'>      <title><data:blog.title/></title>      <b:else/>      <title>       <data:blog.pageName/>      </title><b:if cond='data:blog.pageTitle != data:blog.title'><meta expr:content='data:blog.pageName' name='keywords'/></b:if> <b:if cond='data:blog.metaDescription != &quot;&quot;'><meta expr:content='data:blog.metaDescription' name='description'/></b:if> <b:if cond='data:blog.pageType == &quot;index&quot;'><b:if cond='data:blog.url == data:blog.homepageUrl'>    </b:if> </b:if>

    <meta content='your blog image here.png' property='og:image'/> <meta content='your blog name here' property='og:site_name'/><meta content='your blog description here' property='og:description'/><meta content='your blog description here' property='og:description' name='description'/><meta content='your blog name here' property='og:title'/><meta content='all' name='robots'/><meta content='index, follow' name='robots'/><meta content='article' property='og:type'/><meta content='en_US' property='og:locale'/><meta content='all' name='audience'/><meta content='general' name='rating'/><meta content='website' property='og:type'/><meta content='your blog url here' property='og:url'/><meta content='index, follow' name='googlebot'/><meta content='your keywords here seperated by comas' name='keywords'/><meta content='USA' name='country'/><link href='your google plus publisher address here' rel='publisher'/><link href='your google plus author address here' rel='Author'/><link href='your google plus admin address here' rel='me'/><meta content='your name here' name='me'/><meta content='your email here' name='Email'/> </b:if><!-- Yoast SEO Plugin For Blogger By Livoxt End -->

Step 3:
Replace the Coloured words with your own.

Step 4:
Save & Close

Voila, your blogger template is now fully in Seo mode

Monday, May 25, 2015

How to post html codes to a blog


In this tutorial I will show you the easiest way to post and publish an html code for your blog viewers.
This method will be done with block quotes and how to use Firefox Encoder Decoder Add-on.

Step 1:
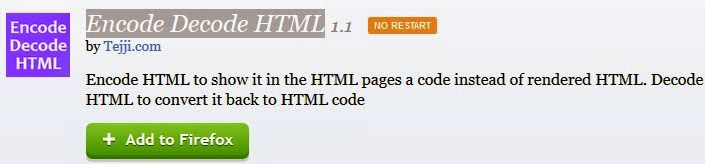
First thing you will have to do is download an add-on from firefox, called "Encode Decode HTML"
Click Here for the link.

Firefox Encode Decode Html Download Screenshot
Step 2:
After you have installed the add-on for firefox, you can find it at the top right of your firefox browser.

Firefox Encode Decode Html Shortcut Screenshot

Im going to use an example from one of my previous posts, like the image below.

Align your widget to center

<div align="center">
Your widget code goes here...
</div>

Step 3:
First highlight and then Copy the entire code in the box above, by pressing Ctrl+C.
"This will basically be the code that you want to show as is on your blog post"

Now if you go to your blogger post and you paste it directly to your blog post either in compose or html mode, it will look like this.

Your widget code goes here...
This is not the outcome that you wanted, it will basically only paste the text area as it is.
You want it to look like the first box, so follow the steps below.

Step 4:
What we need to do is Copy the code in the 1st box above again.

Step 5:
Open your Html Encode Decode Firefox add-on.

Step 6:
Now delete the default text in the "Enter Html" box.

Step 7:
Paste the code in the box by pressing Ctrl+V.


After pasting your code it shall look like the image above.

Step 8:
Press Encode


After encoding, you will get your transformed Html code like above.

Step 9:
Now Copy your transformed code by pressing Ctrl+C.

Step 10:
Open your blogger account and edit your desired post, or create a new one.

Step 11:
Now paste your Encoded Html code in your post.


This image shows how your code should look like in your post.

Step 12:
Highlight your code and press the block quote symbol, marked with a red box in the image above.

Step 13:
Save or Publish your post and your done!

Align your widget to center

<div align="center">
Your widget code goes here...
</div>

The image above will be your end result.


Friday, May 22, 2015

How To Increase the Virtual Memory "RAM" on a computer

Step 1

Right Click on My Computer

Step 2

Select Properties

Step 3

Go to Advanced tab

Step 4

Click on setting button under ‘Performance’.

Step 5

Go to Advanced tab in next window

Step 6

Press change button under virtual memory.

Step 7

In next screen under custom size enter size you want to allocate for virtual memory (paging file).

It depends on your hard disk size and physical memory.
Make sure it’s not less than system recommended size.
Normally recommended paging file is 1.5 of physical RAM.

Step 8

Press Set button, you may need to restart computer.

How to align Blogger Widgets to the Centre, Right or Left

Blogger Alignment


The following codes will help you in aligning your blogger widgets to the centre, right or left.

Step 1:

Choose your preferred method.

Step 2:

Copy the 3 line code.

Step 3:

Upon choosing your code, you can go ahead and replace the words "Your widget code goes here..." with the code, image or video that you wish to align.

Step 4:

After that just save & close and your done!

Align your widget to center

<div align="center">
Your widget code goes here...
</div>
Align your widget to right

<div align="right">
Your widget code goes here...
</div>

Align your widget to left

<div align="left">
Your widget code goes here...
 </div>

Thursday, May 21, 2015

Adding a SEO Friendly Title Name to your Blogger Posts

In this Article I will help bloggers to make their Blog Post Title SEO Friendly by doing a simple Seo trick in 5 easy steps.

By default Blogger Titles isn't optimized for Search Engine Optimization, although the post and or page title is one of the most important if not the most important keys for people to find your page more easily.


Follow the 5 easy steps below:

Step 1:

Go to your Blogger Design > Edit Html

Step 2:

Press Ctrl + F for your search box to appear

Step 3:

Copy the following code in the box below by highlighting it and pressing Ctrl + C

<title><data:blog.pageTitle/></title>
Step 4:

Highlight that entire code and replace it with the following code

<b:if cond='data:blog.pageType == &quot;index&quot;'>
<title><data:blog.pageTitle/></title>
<b:else/>
<title><data:blog.pageName/> - Livoxt Blog</title>
</b:if> 
Step 5:

Replace the name "Livoxt Blog" with your own Blog Name and Save.

You're Done!

Congratulations you now have a Search Engine friendly Blog Title Page
Livoxt Floating Menu Widget